Monday, December 11, 2017

Can you stop?

With lots of kms... 15,000ish... on Rover II I have never had any trouble stopping and although I had replaced the brake pads on my Alhonga brakes last summer, they didn't really need it. I had read many posts toting how much better Avid BB7s were but had no complaints until last week when my right caliper failed. A loud 'click' and no brakes.
Off with the old disk. These 160mm Alhonga disks were still in decent condition
but were not compatible with new calipers. To work on unit I simply turned the trike on its sidepulled the wheel of the axle, flipped it over and re inserted onto axle.
While I had it off I checked the smoothness of the wheel bearings and since I could feel a bit of roughness, gently removed the bearing seals (they simply pop right back in) with a small pick, gave the bearings a few drops of synthetic 180 hd gear oil in a 100cc ink cartridge refill syringe. I keep in my tool kit. Have spare bearings as well but don't think I will need to change till next spring. The bearings on this wheel are the originals.


I removed the unit and the actuator arm was 'sticky and crunchy'. I pulled it apart as far as I could get it and prepared to order a new set of Avid BB7s. My first search on Amazon for same came up with a 'good as Avid BB7 replacement brake set' only 28 bucks delivered for both complete w new rotors.  A few dozen positive reviews and one very negative. What the heck $28 vs $135 for the genuine Avid BB7s. What could possibly go wrong.

The new AfterPartz disk rotor and caliper installed (and ready to fail) and the wheel back in place

The delivery was prompt. The contents of the box looked good. But there was no instructions and no link to same to be found. No problem I plunged on ahead. A disk brake set is a disk brake set, right? I looked at the Avid sight for BB7s and BB5s and followed along. Put on the rotor... no problem. The hardware for the caliper mount was identical to what the Alhonga used... seems standard on all disks and most kits come with two different sets of mounts depending on configuration. Mounted up, adjusted, and hooked up the cable.

Time to test, Spin the wheel, apply the brake and 'click!' The actuator arm moves forward and tension applied to the disk is lost. Spent a half day trying to figure out why. Gave up in disgust and installed the other caliper. Seemed okay, took for ride next morning after 5km, 'Click!' No pressure on disk.. Disconnected cable, fiddled with actuator arm, seemed to reset. Reconnected cable readjusted and resumed ride. After 45 km, pulling into the elevator lobby at the condo, 'Click!' No brakes.

There followed a whole series of emails with the supplier, Amazon and vendor AfterPartz. Someplace in there I gave up and ordered a set of Avid BB7s again from Amazon. They arrived promptly and I installed per their excellent series of YouTube videos ( pretty much the same procedure as used on the AfterPartz. The Avid BB7s worked flawlessly. Beautifully modulated and effective.

AfterPartz had offered several times to send me a replacement set, a discount, or a refund (No need to return the original set). I accept the refund.

Curiosity had to be satisfied. I took the AfterPartz units apart several time to see if I could determine why they failed to work. It is easy to disassembleThe following points were noted:

  1. There were traces of 'tramp' material inside the body of the caliper, that was probably preventing the ridge on the inside ramp from mating firmly with the notch in the caliper body. This ridge/notch keeps the inside ramp from rotating. Rotation would cause the bearings in the actuation ramp to slip back into neutral position.
  2. If the actuator arm was applied too fully without a disc inserted between the pads, it could again cause the ridge in the bottom ramp to slip out of the notch in the body causing slippage.
  3. There is no lubricant inside the caliper mechanism. What does that portend to service life?
  4. There are no thrust bearings in the mechanism.
The guts of the Alhonga Caliper: Complex
engineering and a bear to reassemble. I may
do that when I'm home in the spring. Sorry
about picture quality!

The Alhonga Caliper, I did manage to finally disassemble it. It is quite impressive internal engineering with a ball bearing w cage between two races for a thrust bearing. It was well lubricated and no noticeable corrosion. I suspect the failure is the surface of the cam ramps or the ball bearings that roll on them but I need a magnifying glass to examine. These peepers just aren't up to it unaided.

My new brakes are all installed, run in and with even a fresh set of cables. So I am no longer screaming warnings as other pedestrians, pets, and cyclists scatter when I approach.

Ride on!


Monday, October 23, 2017

Fall Maintenance

To work on Rover II, I suspend the rear of the bike from the garage ceiling by means of a tarp strap hooked into the carrying case on my rear rack. I then lift he front of the trike cruciform onto two adjustable jack stands. This provides a stable platform and I sit on a crate to work on the trike. Comfortable for me and it just works without having to hoist the whole weight up onto a stand. (Also tipped it over the other day to inspect the cruciform for cracks as reported in Forums. There are none that I can see.


Just about ready to head south, but wanted to do some maintenance while I still have access to all my tools. Dropped my WindWrap faring off as it might make getting Rover II up to my 19th floor condo  difficult. Really appreciated it the last month here as it was generally cool and very windy. Besides it's always very warm in Florida, Right?


King Pin Greased and
ready for insertion
Top washer before handle install

New and used bushing. Which is which?


Thought I might need to replace the steering bushings now around 12,000 km, so ordered a new set and waited for a reamer to arrive in case the new ones were too tight as reported in the forums recently. Loosing track of my  mileage. But hardly ever miss a day and then do 40-50 km

I dropped the kingpins out of the frame and tapped out the bushings with a punch and hammer one side at a time. Checked for wear visually and with my calipers. There is no indication of wear on any of the bushings. Can't see any difference between the old ones and the new set so cleaned, greased, reassembled, and adjusted. Messy but was cheap and easy. This is the 3rd time I've completed this lubing procedure.

Was really surprised there was no significant wear. Have never really had a problem with steering and quite pleased at Rover II's service

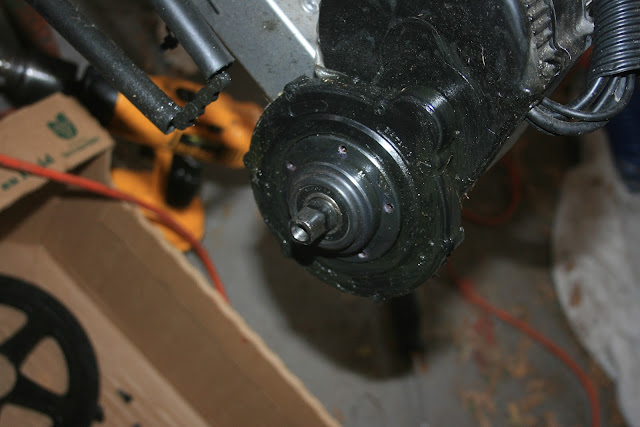
Greasing the final drive in the Bafang BBSO2 was something I had not yet done. I have not taken anything apart on it. since it was installed. The unit runs very quiet still, and I don't really push it very hard, but wanted to take a look inside. There are two sets of drive gears to service. The one on the right side has two steel gears and needs to have the grease replaced before it migrates through the central seal and contaminates to grease in the left side. The plastic gear in the left side is more difficult to open and service, and the stock grease in the right side, can deteriorate that plastic gear. Eventually I will have to service the left side but will try to leave that until next year. (Early Bafang units often were shipped lacking grease) A new adventure.

The procedure was as follows:

Remove the right crank will crank puller and sit chain off the chain ring
Remove the chain guard from the chain ring- 5 screws from back side


Remove the Chain Ring- 5 studs

Remove Plastic cover- gently: many small philips screws
Clean old grease from teeth, repack with Mobil 28 Aircraft Grease
Reassemble
Chain Ring showing a bit of wear- Replace 2018?
I checked the rest of the drive line, cleaned the chain, rear cassette and rear derailleur. The wheel bearings are all tight, and the brakes fine from servicing in Sept. The chain is showing a bit of stretch, and the chainring and cassette are a bit worn. I have a replacement cassette with me and will change it, the chain,  and the chainring if things start slipping. I've put a lot of kilowatts through the BBSO2 so it is to be expected.

Now just sort out a box of tools, bits and pieces and I'm ready to throw it on the carrier and head south. Redneck Riviera here I come!

Thursday, September 21, 2017

Summer is Over

Rover II w WindWrap Faring and Seat Pad ready for Fall
Bike handlebar extensions used for accessory mounts
Summer is over, and its been a great one up here in Rainy River. A few hot days, but generally decent. I rarely took off my winter seat foam pad and with the long days I was able to get out early in the morning, so summer heat was never a problem. Turned on the a/c in the house only once. A bit of rain but generally sunny and dry. Perfect triking weather.

On my ride out today my Bell odometer turned hit the 9999.9 km mark and started flashing telling me time to reset it. I only use it as a back up and check on my Luna 750C  computer for the Bafang BBSO2. Beyond some initial learning curves it has been pretty much trouble free. I have repaired the charging port on the battery by replacing the barrel connector with an XT60 plug. No big deal. Pretty sure I am the one that screwed it up by not following directions... guilty!

Otherwise it runs perfectly. Quiet, powerful, simple, and economical. I will do some seasonal maintenance on it shortly checking the lube in the drive gears... will post details when I do it.

I still do not know the maximum battery range and still experiment with different configuration settings. It has way more power than I will ever use and have set the max current draw down to 15 amps. That would be 750 watts and I never use that level of power. Likewise the thumb throttle gets very little use. I have the max speed set at 32 kph (20 mph) which really is faster than I ever want to cruise with Rover II on the trails I travel. On decent to smooth pavement I run 20-25 kph on gravel I putter along at perhaps 12-15 kph. The great thing is the effort required of my legs changes little, up hill or down, smooth or rough, dogs or no dogs. Just up the Assist Level or drop a gear or two.

Today's ride was a decent test of range. I started out with 50.3v probably 75% charge as my standard charge is only to 80% to maximize battery life. Wind was strong and gusting out of the west at times well over 20 kph. Without e-assist for me it would have been a somewhat unpleasant ride. At times on hills and into the wind sometimes I was drawing up to 600watts on Level 5 assist and probably averaging between 120 to 160watts on Level 3 assist for the most part. Normally on this course I would run on Level 2 drawing 25-75watts. I was running in gears 5,6,& 7 for most of the distance

I finished the 43.43 km with an overall average speed of 16.1 kph and a battery level of 45.3v which my gauge says is 40%. The low battery cutoff is set at 41v. I have yet to run out of power before the end of the ride.

I use MapMyRide when I want stats on my route, but not on a regular basis. Here was today's result.


Temp 50F, Wind w 13 mph w stronger gusts
TIME
START12:21 p.m.
ACTIVE2:41:55
TOTAL2:41:55
ELEVATION
GAIN114 m
START329 m
MAX349 m
Temp
SPEED
AVG 16.1 k
Battery Start 50.3v =75%

Battery Finish 45.3v + 40%

I had to replace my left ProMax brake handle. Rough usage I guess, as I often turn my trike on its side to work on it and noted the lever was twisted a bit and broke at the pin. Since I have the brake shut-off switch glued onto the left brake, I had to cut the epoxy away from the Hall sensor and the magnet. Again a small chore but necessary. A pair of new handles (L & R) was less than $20 from Terra Trike and at the same time I ordered a new set of brake cables, and kingpin bushings. I will need them sometime and when I service the trike before heading south for the winter, I will check them out for wear, and change if necessary.

Earlier this summer, one of my Big Apple tires was pretty worn having run since last fall. I stuck my original tires back on to use them up and ordered a set of Big Ben FS 2.12x20 for the front and put on the Big Apple 2.12 x 24 I'd removed from the rear last winter in favour of a grip tire. I really like the improved ride I get from the Big Bens and the Big Apple. I'm only running them at about 35 psi which significantly improves ride and handling. The increased rolling resistance isn't a problem now with the e-assist.

So there we have it for now. Was looking to test those hills out in Osoyoos, B.C. this winter but decided to do the coming winter in the Redneck Riviera, P.C.B., Fl, one more time. Not much for hills there. Maybe a few sand humps down Route 30 towards Santa Rosa Beach.

Keep pedalin' and grinnin'

Sunday, June 25, 2017

Summary E-Assist & Hiatus

I've been using Rover II with the Bafang BBSO2 E-Assist Kit from Luna for the past couple of months putting on well over 1000 km with many daily rides of 40KM or more. Sorry I can't give you exact distance as the Odometer on the 750C Display has a nasty habit of resetting if you hit the wrong button and there is no way to re-input the correct reading. I have solved that issue by remounting my old Bell Bike Computer as a backup. I had to mount it at the base of the steering arm as I found there was interference between sender and computer if it was mounted close or above the 750C Display.

Generally really pleased with the BBS02 Kit, but have a few issues, mostly solved.

Starting with Luna's 750C Color Display. This is a BETA unit and hope there will be a firmware update in the near future.
Luna 750C Display is very readable speed and watts except with sun glare. Mounted on a handlebar extender mounted to left handle, above brake, throttle, and Level Assist toggle. Smaller text items vibrate too much while riding for me to generally read. Two Green circle graphs glow around Speed and Power when moving- Questionable value 

  1. The Clock feature is erratic, randomly deciding to change the time when the unit is shutdown. Battery installed or not seems not to matter. When operating it seems stable
  2. The screen black w white text and coloured graphics is hard to read under bright/glare conditions.
  3. Watt meter (which I prefer over amp) needs either finer calibration or ability to set sensitivity. I use Level 1 Assist which typically draws an average on level conditions of about 70w but it bounces/jumps up and down from 0 to 26 to 49 to 75 to 96 to 122 (approx. in those spacings). A more stable average reading would be more realistic. The Graph is even more dramatic in its movement at this level of use. At higher watt draw all seems a bit more stable but no one on e-assist is going to be running consistently at several hundred watts...unless a bear is chasing you
  4. No USB outlet for cell or headlights.
  5. No cadence monitor although the motor has a cadence sensor in it. Part of the PAS.
  6. Inability to input Odometer readings. Trip Odometer does not reset to zero unless you start riding immediately after resetting
  7. Screen scratches easily. Anti scratch shields makes reading even more difficult.
  8. No clear outline of how/if firmware can be updated.
  9. Many settings listed that have no apparent function/effect for the BBSXX motors.
Learned a few things about troubleshooting problems with the BBSO2. First off Luna was quick and knowledgeable assisting after I opened a 'trouble ticket'. The ticket had an auto answer immediately and a followup email addressing the issues within 24 hours during weekdays.

Luna's Forums had some of the answers I needed, but I had not looked close enough initially. Other, when diagnosed as new was quickly added to the forums.

My first problem showed up as a sudden shut down and refusal of the unit to accept a charge and not start up.

The initial problem was probably caused by me not connecting/disconnecting the battery charger properly. Each battery system/charger has very specific orders to follow and they were posted in the forum. I just did not find them in time to follow properly. The resultant connection 'sparks' had caused my battery management system (BMS) to 'trip'. 'Jump starting' the battery per the forum corrected that issue, but like many intermittent electrical problems I still had something unresolved.

Strange behaviour continued. Unexplained shutdowns, sudden surging of the unit to high watt draw without using the throttle or the pedal. I looked and looked finally noting arc burns on the cradle connection posts. Cleaned and reinserted battery. Seemed to work okay, but still unexplained shutdowns. Noted on one shutdown, unexplained bouncing of the voltage 36-51-36-40. Was stumped.

Battery connector prongs in base of cradle

Prongs had arcing marks indicating poor connection

Placed two velcro straps under cradle to hold battery tighter. Note round locking hole at right end of cradle. If battery not inserted fully into cradle, locking pin can simply deflect cradle back appearing battery locked when in reality is not.

Battery inserted after battery contact clamps  were bent (carefully  w screwdriver) to more firmly grip the cradle contact prongs. Velcro straps around battery and cradle

On Luna's suggestion carefully bent the contacts on the battery so they would grip the cradle contacts more positively. Then further used two velcro straps under the cradle and around the battery to reinforce battery/cradle contact.

That solved the issue. No problem since. Hard to believe it was that simple. I was ready to start ripping battery cases and controllers apart. Vastly relieved and very impressed by the email and forum support I received.

Been out riding pretty much every day and love the operation. Runs very smooth and quiet. Using the stock Luna program settings for now and cruise at around 22kph L1 and sometimes L2 assist. Rarely use throttle. Charging battery on lowest charger setting to 80% except once a month to 100% to allow BMS to balance cells.
 My runs are 40-50 km max and not running out of power. If going further charge to 100% just prior to run.

So that's it for Bent on a Budget for the time being. I'm taking a hiatus for the rest of the summer and will post again when I have something noteworthy.

Enjoy the ride!

Sunday, June 4, 2017

Programming by the Numbers

Last post I recounted my initial foray into custom programming my Bafang BBSO2. After my comparison of the Luna Hot Rod settings that came with the drive, I tried the Penoff settings that came with the programming tool and was amazed at the difference- good, bad and indifferent. I am still baffled by what some of the numbers mean and what changes will happen, but am convinced the scope of the settings are able to radically alter the type of performance attainable with the programming tool. But you can't go about this nilly-willy. I found and opened an xls spreadsheet with a bunch of different settings. It is available from DropBox here: https://www.dropbox.com/sh/fcen6yukxar428y/AADzGWzsm3M6jDrP5F948rR5a/Profile%20Comparisons.xlsx?dl=0

But let's step back for a minute. My 750C has a bunch of settings as well. Different displays will be different. Some of these settings adjust the settings programmed into the motor controller, again depending what settings are in the controller.

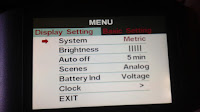
By pushing the "Menu" button quickly twice, I access those settings and then navigate through them and set some of them. Here is are some screen shots:


They are pretty much self explanatory.

Then comes the fun part. Setting up each of the three tables that are loaded to configure the controller in the Penoff or M2.0 Programming software for the motor controller. I downloaded mine from the internet at :
https://penoff.wordpress.com/2016/01/13/e-bike-conversion-software/
You have to extract the zipped file. Includes the executable configuration tool, a help file, and some .el files which are the data files

To use the Penoff Configuration Software Tool, you connect the Communications Cable (from Luna) to the green plug coming from the BBSO2 motor to the display, Here:

Cable w green plug coming from BBSO2 to your display
Next turn on or insert your battery open the Penoff program on
your computer and click connect. I use a Windows 10 Laptop w a USB 3.0 port. It worked without a hitch. Except once my Defender did not initially 'trust' the Penoff file and I had to overide its objections.

The first chore is to click 'Read' for Each of the three pages or 'Read Flash to to see what the current settings in the BBSO2. Then click 'File" and 'Save As' naming the file and storing the current settings to you computer for reference or to reinstall at a future date.

NOW you can 'Load' the desired new .el profile into the program. I loaded the 'JPLabs Relaxed' profile from my laptop. I had created a list of several profiles- .el files- from the comparison XLS Spreadsheet I had downloaded from Dropbox. Here is what the JPLabs populated configuration tool screens looked like:


Apologize for the quality of these picts. They were cell phone shots of my computer screen. At the top of each screen are the headings: "Basic" "Pedal Assit" and "Throttle Handle". You can readily see there are a lot of numbers and the descriptions of what each one will do is not readily evident. Don't blow your eyeballs trying to make out the numbers here, suffice to say you want to use the program to "load, populate, name and then save" a proper .el file. To transfer the date to the BBSO2 you simply click 'Write' for each individual page or click 'Write Flash' to transfer all three pages. It only takes a few seconds. 

Finished? Click 'Disconnect', unplug your programming cable, replug your green cable end to your display, fire up your trike and off you go. 

Transferring an .el file into the BBSO2 is perhaps a 5 to 10 minute job.

Preparing the .el files. Lots of thinking there particularly if you are starting from scratch.

So far I have run the stock Luna HotRod, Penov Standard, and JPLabs Relaxed Settings. I have been running them over a standard course about 27 km trying to maintain the same speeds 22-24 kph. JP Labs Relaxed is best so far for my trike, roads and legs. In Level 7 Assist in 6 and 7 gear it draws 25-50 watts once I attain cruising speed over 22kph. If I drop below that speed to 21 it will boost power up as high as 550w when I am climbing a hill, but not gearing down and under the 21 kph speed.

Acceleration at this level of assist in lower gears is quite strong, but the delay in applying power from a stop to start cranking is very soft giving ample time for shifts to complete. The Penoff settings were quite abrupt in this regard.
  
So I have lots of profiles to test and as I understand what some of the more obscure settings mean and will do I look forward to continuing the adventure.

Thursday, June 1, 2017

Program the Beast

Always knew the BBSO2 could be programmed to meet individual likes and different trikes...just did not know there were so many possibilities. Both the Luna  and the Endless Sphere Forum have pages and pages of posts of various combinations and the whys and wherefores. I'm probably more than a bit dyslexic and read much of it over and over again. Hopeless!

Finally decided to take the plunge. Found and loaded the Penoff program that performs the task. plugged in my programming USB cable to the Green plug coming out of the motor harness, fired up the computer and clicked the 'connect' button. Hot Dog! It worked!

Following directions I clicked 'Read Flash' and the appropriate blanks on the page  filled with new numbers. I confirmed they were the stock Luna Hot Rod settings. I saved the file to my computer in case I wanted to revert.

Then I loaded the program with the Penoff .el file I had downloaded from the internet and clicked 'Write' a 'confirmed' message appeared so I clicked 'Write Flash' and in a few seconds another 'confirmed'

I clicked 'disconnect', unplugged the computer, replugged the Green wire to the computer display, returned the computer to the house and checked for any news flashes to insure my action had not triggered a diplomatic incidence or crashed the air traffic control system.

Then I returned to the bike, pointed it towards the door, turned on the power, and gripping the brake levers gingerly applied pedal power. It took off like a B.O.H. Fortunately it stopped when I stopped turning the crank... Actually it wasn't that bad.

As I explained in the previous post my goal was to program "Relaxed" parameters into the Bafang Controller. But there were those dozens of posts explaining all these settings talking about '% Decay', '% Speed', 'Angle' something. I only had the vaguest idea what some meant and no idea what others were. Plus the warning, "Not responsible if you fry your controller". So I decided to try the standard Penoff alternative... he's the guru that wrote the programming tool.

Anyway I took Rover II for a 25 km spin this evening to see how these Penoff settings changed performance. They did indeed change the performance. Some things I liked, others not so much.

The Luna Hotrodded settings I found generally put out too much power. I cruised in Level1 or 2 and ocassionally 3, Levels 4-9 were basically not used.

The Penoff settings were more like a cruise control. Setting 6 cruised at 21.7 kph with wattage output varying from 0 to +400 depending what was required to maintain that speed. In Luna settings max watt per setting was in steps of about 100w.

The cadence required with the Penoff seemed somewhat lower as well. You picked a gear that provided decent pedal resistance just over the cruising speed. If you dropped below that cruising speed a shot of power was delivered to increase you speed. The Penoff setting also tended to 'search' for the cruising speed if your gear was too low or your cadence too fast.

Also the Penoff settings forced you to change Levels if you were slowing down as the acceleration was very strong (BOH) as soon as you started pedaling. Also made smooth shifting a little trickier.

So what did I learn ...so far.

  1. Loading the program from one set to another is quick and easy.
  2. Determining what figures to use in a program is much more difficult
  3. The response of the system to different figures is very broad, hence customizing the system to your likes or vastly different terrain conditions should be doable.
  4. Feel like I'm back in kindergarten
I'll put a few picts in this post this weekend and perhaps some more thoughts. Also be looking at some other settings files i.e. JP Labs

Saturday, May 20, 2017

Learning Curves Bafang BBSO2


With the BBSO2 installed on Rover II the real lessons begin. Curiosity killed the cat. What will it do to Rover II's chain line? Let's review the goals

  1. I want to cruise comfortably regardless of headwind, hills, or hard rolling resistance without wrecking my knees
  2. I still want a comfortable but reasonable amount of exercise. As long as the pedals go round my leg muscles are gaining
  3. High speed is not a goal with 20-30 kph on the open road  reasonable for my area. The legal e-assist speed in Ontario is 32 kph.However you can coast as fast as you want unassisted. In Minnesota its 20 mph e- assisted or otherwise. 
  4. I want to meander along at 10-15 kph on the walks and trails in town where there is significant pedestrian traffic
  5. I want to be able to go further, finding over 35 km per trip on my home route unassisted is about all my knees will tolerate.  50 to 70 km on a charge would be nice.
My kit included a new 750C colour display. It was just released and like most things e-assist, instructions were scant. A link on the Luna Cycle Forums https://electricbike.com/forum/forum/ask-lunacycle/luna-cycle-new-products/32467-new-750c-color-display-for-bbshd-and-bbs02 got me started. This display has a few bugs and shortcomings I hope will be addressed by a firmware upgrade in the near future, but on the whole it seems decent. I have not changed any of the controller settings that came with the unit. They are the stock settings as supplied by Luna. I have a programming cable and will look at them in the future.


The main screen combined digital and graphic displays provide an uncluttered easily readable info on speed, watts consumption and assist levels. Smaller print provides more info on trip, odometer, battery level, time and other items you would expect on a bike computer. There are some issues with glare under certain conditions, but still generally fine for me. Navigating around the computer brings up a whole bunch of info I do not understand and is not yet active for the BBSO2.


The one main change I have made is to the E-Assist Levels. I changed it from the default 5 to 9. This fit my route conditions and my style  better. Now in Level 1 power consumption appears to be around 90 watts and for much of my paved route without a headwind I run in 6th gear at 21-23 kph.aiming for a cadence of 60-70 rpm.With a stiffer headwind or grade I go to Level 2 and appear to be drawing 170-190 watts, Really ugly northwind the other day, I went to Level 3 drawing about 300 watts. Don't know how accurate that watt readout is and it bounces around a fair bit you look for an average.

I also changed the speed limit assisted maximum to 32 kph to be in accordance with Ontario law. It does work and interestingly the throttle assist only increases the speed to that max. Also higher e-assist levels will draw higher watts up to the speed limit and then cut back to lower watts. The level seems to 'hunt' for proper wattage when you are against the upper speed limit, but is more stable when 3-4 kph below the max. Hmmm?

On a bit of a down grade with a tailwind I use Level 1 in 8th gear running  29-31 kph with a 65-70 cadence. Again wattage drops way down at 31-32 as no load.(There is no cadence readout on this computer I just calculated  using BikeCalc.com) Here I may do some coasting and stop cranking in which case the power assist stops and you pump again when you want/need it.
I've found setting the lower level of assist now in Level one more my style when riding slower on variable gravel road surfaces, even running in a lower gear.

Shifting and pedaling with a PAS e-assist rather than a torque sensor like in the Tongsheng TSDZ2 or some of the other OEM mid-drives i.e.Yamaha. Bosch is described as a little different, but the essentially the same problem. (No personal experience on other systems) You don't want the e-assist pumping out power when you are trying to shift.

On the BBSO2 this is easily accommodated , particularly on a trike. Some use a gear shift sensor, but I think they are wholly unnecessary on a BBSO2. Think of it as driving a stick shift particularly truck carrying a heavy load. When you pause pedaling the chainring stops (it's right in front of you and very visible) as power to it is shut off, and will not start until you resume pedaling. Shift your gear- up or down- and turn the pedals a little bit -sixth or quarter turn- and a little shot of power will spin the chain ring a bit pulling the chain through the rear derailleur smoothly without undue stress on the chainline as you have only momentarily sent power to the chainring. You cannot of course change gears at a complete stop or under heavy load without the 'crunch' on the rear sprocket, just like you cannot engage gears on a stick shift under heavy load or at a full stop without  properly using the clutch. Sound complicated? It's not.

Never operated a trike with a Nuvinci hub, but bet it would be sweet with this e-assist.

Finding the proper cadence is important on I believe all e-assist, as DC motors have efficiency curves. The BBSO2 'sweet spot' appears to be in that 60-70 rpm cadence. Maybe even faster but I find higher cadences uncomfortable and subject to fishtailing. Certainly 20-30 rpm cadences don't feel like they are putting out power comparable to what the watt meter is showing.
Speed KM per Hour  at Cadence 24" Wheel
Gear Cogs 5 7 9 11 13 15 17 19 21 23 25 27 29 31 33 35 37 39
8 48x11 10 14 18 22 26 30 34 38 42 46 50 54 58 62 66 70 74 78
7 48x13 12 17 21 26 31 35 40 45 50 54 59 64 69 73 78 83 87 92
6 48x15 14 19 25 30 35 41 46 52 57 63 68 74 79 84 90 95 101 106
5 48x17 15 22 28 34 40 46 53 59 65 71 77 83 90 96 102 108 114 121
4 48x20 18 25 33 40 47 54 62 69 76 84 91 98 105 113 120 127 134 142
3 48x23 21 29 38 46 54 63 71 79 88 96 104 113 121 129 138 146 154 163
2 48x26 24 33 42 52 61 71 80 90 99 108 118 127 137 146 155 165 174 184
1 48x34 31 43 56 68 80 93 105 117 130 142 155 167 179 192 204 216 229 241

In town when I don't want/need e-assist, I simply reduce to Level 0. The freewheel clutch in the drive motor incurs no drag as nothing in the motor is turning. Do not notice any difference in pedaling resistance between this and a simple bottom bracket.

The BBSO2 has a Thumb variable throttle control I rarely use. It has amazing torque that would certainly shorten the chainline life and perhaps the internals of the BBSO2 as well as the battery range if used injudiciously. But it is always available regardless of Assist Level as long as power is on. occasional boost going up a hill. Very handy for spinning the chain line when I have the trike suspended and setting up the shifting on the rear derailleur. On a test across a level strip the trike would quickly spin up over 30 kph, but was drawing over 900 watts so would quickly drain the battery.

Ride is as smooth with 20.5x2.12 Big Apple fronts and 24x2 Knobby rear. In fact it seems as good at 25 kph as it was at my humble 15 kph I used to ride unassisted. it is virtually silent, with the knobby rear tire and the chainline tubes providing the most noticeable sound. Gravel roads are readily navigable, with the only caution really loose gravel and washboard.

Range. Not sure yet. I have done 50 km on a combination of gravel and tarmac roads with a bit of grade and some headwind. Voltage showed I was down to 46.2 at end of trip. Battery voltage 'sags' during operation and then rebounds a volt or two after a few minutes rest. Motor gets barely warm to the touch sometimes and battery case not at all. I have been charging the battery in slow mode to 80 or 90%capacity with the occasional charge to 100% as recommended.

Wednesday, May 17, 2017

The Purist goes E-Assist

I have been looking at E-Assist and after experiencing the Hills of Osoyoos last winter, I finally pulled the trigger and bought a Bafang BBSO2 Mid Drive kit from Luna Cycle. It arrived in April. The decision to go with the BBSO2 and Luna rather than an alternative was decided not so much on price and features, but on availability of  consistent reputation, parts and options.


One Karl Gesslein of https://electricbike-blog.com/ has spent the better part of the past two years and a small fortune doing his very best to destroy every e-bike motor including the Bafang BBxx models offered. His exploits on e-bikes are perhaps bordering on the insane. If a mid-drive e-bike motor can survive his torture tests, they should serve the normal person very well.

Educating yourself is a must, with no end of resources. As well as Karl's blog there are several others. Two I would recommend are electricbike.com, which is run by Luna Cycles a Bafang distributor and another Electric Vehicle and Technology Forums endless-sphere.com. Both are a wealth of information and opinions. You will need the resources they offer. The Power Assist  forum on BROL is also great

Ordering my BBSO2 kit from Luna was fairly straight forward, but I did not know what options I would need to mount it on a Rover trike so I only ordered a longer main harness, an upgraded battery charger, and a speedometer cable extension, opting to start the installation and then order additional cables after I measured things up.

Taylor at TerraTrike found me a spare Rover boom in his surplus inventory for $95 which I thought would be handy in that I could premount the Bafang drive without having to take out the bottom bracket and chainrings. If I ever wanted to switch back either permanently of temporarily (meet with no e-assist allowed) I could do it in a matter of minutes.

The beautifully packed Luna box arrived UPS as promised. I opened it, unpacked eveything and spent the next half day scratching my head and wondering what to do first. There was not a scrap of instructions. Not one of the various packages of parts and cables had a label on it. The grey matter had to do some extra work. It really was like the first day of school.

I mounted/dismounted the drive on the front of the boom a couple times. Slept on it and then did it again. Could it possibly be this simple?

Mounting the battery was a conundrum. I finally decided crossways behind the seat against the rear fender would provide the best weight distribution -about as far behind the front axle as the drive was in front of axle. A couple of pieces of 3/4 in plywood, my router to make an mounting notch, some wood screws, and a couple of heavy gear clamps made a solid platform for the quick release battery bracket. I used similar hardware arrangement to mount my Windwrap faring. It is solid, reasonably light and just works!


I put the boom with the drive through the crciform and into the frame tightened the grub set screws, and started measuring and plugging it wires. It went pretty well.

  • I needed a power cable extension 22", a piece of HD ext cord soldered in- done
  • speedometer ext was too short rather than order another I cut and extended with Cat 6 network cable using 3 of the twisted pairs to extend. Worked.
  • installed speedometer sensor on left rear. straight forward

  • plugged in over-length harness and routed along boom to cruciform and up left steering arm.
  • Mounted throttle control and main control switch to left handle bar. Crowded but ok.

  • Mounted Display computer to an accessory bar I previously used for cell phone. OK for present.
  • Epoxied magnets for the Hall sensor brake power cutoffs to both brake handles. Took three views of different YouTube videos to figure that one out.
  • Stuck Hall sensors on brake lever bodies.They have self adhesive pads. Works ok
  • Plugged in left brake sensor. Works OK
  • Right brake sensor requires extension cable which I must fabricate myself if I want.(don't think I will need it) About 24 inch. Cat 6 as with speedo cable would work fine.
  • Zip tied the wiring up in place. Charged the Battery, Plugged it in. Nothing blew up or smoked. Played with controls and took for short run.
  • It works flawlessly and very quiet.
Rover II E-Assist ready for first test run

The working installation is complete, but I have a number of things to refine. I need to tidy up the wiring and seal the connectors. I will redo the power cable extension as it is too long. The battery mount is fine but I need to put some stain and sealer on the wood. The wires down the main boom are shrink wrapped at the joints but I will put some loom over it to tidy it up. A better mount for the display is in order.


So how does it work. Fine, But lots to learn. However I no longer dread stiff headwinds or towering hill. And my knees are very happy. Details in next post